7 Sept 2012

lemon cream-cheese frosting

 what you need
  • 12 oz cream cheese, room temperature
  • ¾ cup unsalted butter, room temperature
  • 3 cups powdered sugar, sifted
  • zest of 1 lemon
  • 1/2 tsp lemon juice

method
  • In a large bowl, mix cream cheese and butter until light and fluffy.
  • Mix in powdered sugar one cup at a time until well integrated.
  • Mix in lemon extract.
  • Spread or pipe onto cupcakes.
  • Top with mint leaves.

6 Sept 2012

creaming butter and sugar

I often get asked about the process of baking a cake.  Most non-bakers or amateur bakers think that baking in just putting in everything together, giving it a whirl in the food processor or stand mixer, once it is a batter, pour in a greased and floured pan, stick in the oven and boom - a beautiful cake.  Often it is not the case.  In fact it is never the case.  No matter how many of those store bought cake mixes will boldly say so on their packaging, it is never the case of 'stick it all in, mix it, pour it and bake it'.

Some of the best cakes such as pound cakes or sugar batter cakes requires a method that begins with 'creaming'. Creaming is when you mix fat and sugar to a nice fluffy texture.  Technically, in the creaming process, sugar and fat are beaten together to form and capture air bubbles, bubbles that form when the edges of sugar crystals cut into fat molecules to make an air pocket.  Simply put it assists in the aeration process leading a light crumb with a great mouth-feel.

The actual process:
  • In the bowl of a standing mixer, add the butter and sugar.
  • Using the paddle attachement, mix first on the lowest speed.
  • Once combine, stop and scrape down the sides of the bowl. Initially the mixture will thick and somewhat lumpy. As you continue to beat, the mixture becomes creamier in texture, more uniform, and lighter in color as air is beaten in.
  • Continue to mix on medium (or second) speed; until the mixture is pale and creamy.
Points to remember:
  •  Always use the paddle attachment of your stand mixture.  
  • Always begin to mix on first or low speed.
  • If the butter is not at room temperature, dice into small cubes.
  • Always scrape down sides of bowl to incorporate all the butter and sugar.
  • It takes time, not much but it requires patience.  Usually 3 -  5 minutes depending on the quantities.  
  • Change mixing speed to medium once it's all combined and continue at that speed.  
  • Increasing speed to high WILL NOT hasten the process.  It will create a lumpy mess.
  • A nice creamed mixture will have a pale lemony color and a thick pouring consistency called the ribbon stage

 
Enhanced by Zemanta

vanilla cake


It's funny how I'm always on the hunt for weird cake recipes; recipes that call for unimaginable ingredients like saffron or lemongrass and even chilli and even weirder combinations like honey and cheese (yes I have come one such recipe). I take all the trouble to find these recipes, try them out, tweak them if necessary, take pictures with my outdated gadget (I'm not going to call it a camera), put it out here on the WWW hoping someone with a crazy craving to eat a home-baked chilli chocolate cake will eventually land up on my blog and try it out and comment on it but what do I get.  A phone call.  Yep a phone call.

A phone call from a dear friend asking me how to make a Vanilla Cake.  Vanilla Cake? Are you serious?  That's been around for a gazillion years. If Christ had a choice, he would have shared Vanilla Cake instead of bread.  That's how long and old and timeless and classic Vanilla Cake is.  And that's when I realize.  Not all home-bakers start at the same point.  Not all home-bakers continue to bake at an equal pace.  And most importantly not all Vanilla Cakes are created equal.  Some have difficult methods that result in light fluffy cakes.  Some have easy methods that end up in beautiful super moist cakes.  Some have weird techniques such as cook the egg to a certain temperature before adding flour and no other fat.  Vanilla Cakes, as old and classic as they are, can be as complicated or as easy in their preparation methods.  It all depends on finding, trialling, tweaking, capturing and sharing a recipe that suits your taste.  This one definetely suits mine and hope it does yours too...
vanilla cake
what you need

dry
  • 315 g cake flour, sifted
  • 20 g baking powder
  • 5 g salt
liquid
  • 150 g egg whites (from approx 5 large eggs)
  • 180 ml whole milk
  • 9 g vanilla extract
creaming
  • 350 g sugar
  • 170 g unsalted butter 

method
  1. Preheat oven to 180°C. Butter two round 8-inch pans.
  2. In a measuring cup, combine and stir the egg whites, 1/4 cup of milk, and the vanilla. 
  3. In the bowl of a standing mixer, whisk together dry ingredients to combine.  
  4. Add butter and 1/2 cup of milk and using the paddle attachment, mix on low speed until just moistened. Increase to medium speed and mix for 1 1/2 minutes.
  5. Scrape the sides of the bowl and begin to add the egg mixture in 3 separate batches; beat on medium speed for 20 seconds after each addition.
  6. Divide the batter in two (weighing is the best idea to ensure the cakes are equal) and spread evenly using a small offset palette knife.
  7. Bake 20 minutes or until a cake tester comes clean when inserted into the center. DO NO overbake or you'll end up with a very dry cake.
  8. Gently remove from tins and cool on greased wire racks for 10 minutes. 
  9. Gently turn cakes back up, so the tops are up and cool completely.

Whipped Vanilla Bean Frosting
Ingredients
  • 375 g unsalted butter, softened and cut into cubes
  • 480 g icing sugar
  • 45 ml milk
  • 1 vanilla bean, scrapedpinch of salt
method
  1. In the bowl of a standing mixer fitted with the paddle attachment, whip butter until pale and creamy.
  2. Add icing sugar and salt and mix on low speed for minute until it's all combined.
  3. Combine milk and vanilla bean and gently pour into the mixture and mix on medium speed until the frosting becomes very pale and fluffy.

Vanilla Cake Assembly
  1. Place bottom cake layer on cake plate or 8″ round thin cake board.
  2. Using a serrated knife, gently but quickly take off the top crust on both cakes.
  3. Pipe swirls on the outer edge and a big swirl in the center.  Alternatively, spread the frosting evenly using an offset spatula.
  4. Gently place 2nd cake layer on top (exposed side face up). Repeat step 3 
  5. Decorate with sliced strawberries.
Enhanced by Zemanta

24 Aug 2012

pina colada cake

There was a time when I used to love Pina Coladas, when I lived in the Middle East that is. It was just the kind of drink on a lazy weekend in the summer, when temperatures dared to cross the 50C mark. Sitting pretty at the goan bar at Marco Polos (I think that was the name, it was eons ago) sipping away on Pina Coladas without a care in the world listening to Caje strumming away some or the other 80s ballad.

Speaking of Caje, there is another Caje I know who could also strum a good note or so. He and his wife were the first people to taste my pineapple upside down cake because it was the first time I had attempted it. A few weeks ago when I put a pic of myself dressed in Chef's jacket on facebook, he was one of few million people to wish me luck and actually reminded me of the cake that turned out delicious more out of fluke than anything else.

This recipe however, I decided to make a Pina Colada cake, a riff of the classic Upside Down Cake, which of course means I have added alcohol (just a wee bit, you dont have to if you dont want to) and coconut cream instead of sour cream.  Dense, moist and unforgivably delicious. 
pina coloda cake
ingredients
topping
  • 250 g dark brown sugar 
  • 125 g unsalted butter
  • 1 can pineapple slices (approx 500 gms) drained.
cake
creaming:
  • 185 g brown sugar
  • 250 g unsalted butter
  • 4 large eggs
dry:
  • 375 g plain flour
  • 6 tbs almond meal
  • 2 tsp baking powder
  • 1/4 teaspoon salt
liquid
  • 3/4 tsp vanilla extract
  • 125 g coconut milk
  • 60 g dark rum
method
topping
  1. On medium heat, combine sugar and butter, until sugar is dissolved.  Once sugar melts, DO NOT STIR. 
  2. Pour mixture into a 9 inch cake pan and arrange pineapple slices in a single layer in concentric circles or any pattern that suits you.
  3. Set aside.
cake
  1. Preheat oven to 160C. 
  2. In a bowl, whisk all the dry ingredients to incorporate. 
  3. In a jug, whisk together the liquid ingredients to combine.
  4. In the bowl of a standing mixer, cream butter and sugar until pale and creamy.  
  5. Add eggs one at a time, beating after each addition. 
  6. Add dry ingredients alternately with the liquid ingredients beating well after each addition. 
  7. If you have any left over pineapple, dust lightly with flour and gently fold into the batter after everything else has been added.
  8. Pour cake batter over caramel and pineapple in pan.
  9. Bake cake for 60 - 75 minutes or until a tester/skewer comes out clean.  But do remember to check at 45 minutes. 
  10. Cool cake in pan on a rack for 10 minutes. Turn cake out onto a platter. 
  11. Serve warm or at room temperature with a dollop of icecream. Yumm...

Enhanced by Zemanta

13 Aug 2012

orange and almond cake


If you're a bit of a scatterbrain like me, this cake is just perfect.  Because for one, you dont need to preheat the oven or keep the butter out to bring to room temperature or sift the flour.  It's amazing how easy this cake is to make. And all just before you start to make dinner. 

And even though I'm not a fan of warm desserts, I enjoy making and having this cake because it was easy to make and just wonderfully soothing. A bit like comfort food. It reminded me of my childhood. I guess it's because of all the spices in the syrup as Mom used to make a similar semolina cake. And the best part is the ingredients are not similar to regular cakes. There is no flour to begin with. Of course that doesn't mean it's gluten-free. It's not. Because bread crumbs come from bread which has gluten, so unless you're able to source gluten-free bread from which you can make breadcrumbs, this will remain a cake with gluten.

It's great as a winter cake and easily converted to a winter dessert with a dollop of mascarpone if you must. The syrup lends this cake a very luxurious mouth-feel. And of course the ground almonds makes it a dense and moist cake. And because I luuuurve alcohol in my desserts, I stepped it up another level by adding Cointreau to the syrup.  So if you've got an extra 10 minutes to kill (HA!!!) before you start making dinner, give this cake a whiz.

orange and almond cake
for the cake
  • 40g dried breadcrumbs
  • 200g caster sugar
  • 100g ground almonds
  • 1 teaspoon baking powder
  • 200 ml sunflower oil
  • 4 medium eggs
  • Zest of one orange
  • Zest of half a lemon
for the syrup
  • 2 tbsp lemon juice
  • 4 tbsp orange juice
  • 50g sugar
  • ½ cinnamon stick
  • 5 – 6 cloves
  • 2 star anise
  • 3 tbsp Cointreau
method
for the cake
  1. Lightly grease a 21cm spring form cake pan with butter or cooking spray.
    In a bowl, whisk together all dry ingredients.
  2. In a separate bowl, whisk the eggs, oil and citrus zest until combined. 
    Add the liquid to the dry ingredients and combine well. 
  3. Pour into the prepared tin and place in a cold oven.
  4. Set the oven to 180 C and bake for 60 - 75 minutes until evenly risen and browned.
for the syrup
  1. In a saucepan, combine all the syrup ingredients and slowly bring to the boil.
  2. Continue to boil for 3 minutes without stirring.

Once the cake is baked, remove from oven and generously drizzle with syrup while still hot. 
Leave in cake pan for a few minutes to cool before serving.
Enhanced by Zemanta

Chocolate Banana Baklava Cupcakes


Take baklava (the middle Eastern dessert featuring buttery phyllo dough, nuts, and sticky sweet honey), add a layer of brownie, mix in some banana chunks, bake in jumbo silicone cupcake liners, and you get chocolate banana baklava cupcakes.  As a baklava fan through and through, I never thought baklava could get any better than the traditional Greek baklava that I order every chance I get.  I was wrong.  Silly me, everything is better with chocolate!  Plus, the banana adds one more surprising and delightful flavor to the mix.

Chocolate banana baklava cupcakes are more labor-intensive than most cupcake recipes that I make.  However, none of the steps are difficult.  If you've got time, you CAN make these and they will be worth every second!

Take a look at a couple more photos and then I'll tell you how to make them. 


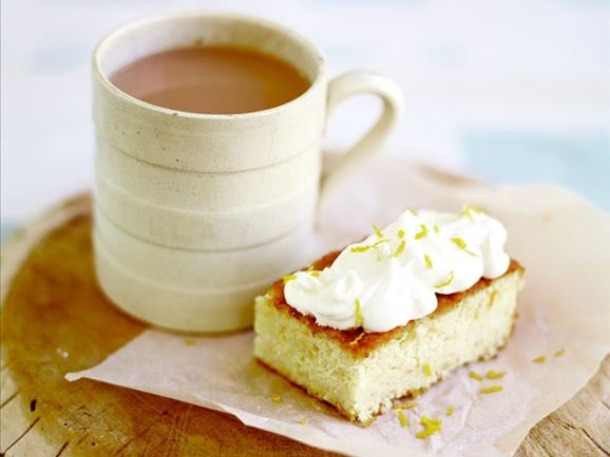
After they are removed from the oven, the cupcakes got a shower of honey syrup.
The cupcake popped easily out its liner and begged to be cut into.
How to Make Chocolate Banana Baklava

Yield: 6 jumbo cupcakes


Prep Work:  Defrost phyllo dough

Phyllo dough typically comes frozen in rolls.  The night before you are ready to bake, remove 8 ounces of phyllo dough (for me, that was one of the two rolls in my package) from the freezer and place it in the refrigerator to defrost.  Prior to starting step 1, take the dough out of the refrigerator and place it on the counter.  Leave it sealed in the package until you are ready to use it.

Step 1:  Bake brownie disks


This baklava has a brownie baked inside. To achieve this effect, it is necessary to pre-bake brownie disks (shown above).
  • 6 tablespoons all-purpose flour
  • 1/2 cup sugar
  • 3 tablespoons cocoa powder
  • 1/4 teaspoon salt
  • 1/4 cup unsalted butter, room temperature
  • 1 large egg
  • 1/2 teaspoon vanilla extract
  1. Preheat oven to 350 F.
  2. Mix all ingredients in a small mixing bowl until fully combined.
  3. Divide evenly between 6 jumbo silicone cupcake liners.  For this recipe, you must use silicone.  If you use paper, it will get soggy from the baklava syrup and it won't look as good.  Also note that the liners will not be filled anywhere near to the top.
  4. Bake for 20 minutes or until a toothpick comes out dry.
  5. Cool to room temperature, remove from liners, and set aside.
Step 2:  Prepare Honey Syrup

The honey syrup will be drizzled over the baklava cupcakes once they are cool.  I got the recipe for the honey syrup and the basic baklava recipe from allrecipes.
  • 1/2 cup water
  • 1/2 cup sugar
  • 1/2 teaspoon vanilla extract
  • 1/4 cup honey
  1. In a small saucepan, bring water and sugar to a boil.  Stir periodically, until sugar is completely dissolved in the water.
  2. Add vanilla and honey and simmer on low heat for twenty minutes.
  3. Remove from stove and cool to room temperature.
Step 3:  Make the banana, nut, cinnamon mixture

This mixture of bananas, nuts, and cinnamon is used both as layers of the baklava and as a topping.
  • 1/2 pound nuts, chopped finely (I used walnuts, but pistachios would be a nice traditional choice)
  • 1/2 teaspoon cinnamon
  • 1 ripe banana, chopped finely
  1. Optionally, lightly toast the nuts on a cookie sheet in a toaster oven (I used my Breville) or in a small skillet.  I prefer the taste of toasted nuts, but the nuts would be good either way.
  2. In a small bowl, mix nuts, cinnamon, and banana.
Step 4: Build the baklava

This is the fun part!  It's where you get to be an architect and put everything together.  First, I'll give you the basic blueprint and then I'll go into the details.  The blueprint below presents the cupcakes just as you would eat them - from top to bottom.

 Baklava Blueprint
Honey syrup (added after the cupcakes are removed from the oven)
Nut mixture (added after the cupcakes are removed from the oven)
6 layers of phyllo dough (butter between every two layers)
A layer of nut mixture
2 layers of phyllo dough with butter on top
A layer of nut mixture
2 layers of phyllo dough with butter on top
A layer of nut mixture
2 layers of phyllo dough with butter on top
Brownie disk
6 layers of phyllo dough (butter between every two layers)

Now, the details...
  • 8 oz room temperature phyllo dough (that you set out earlier)
  • 1/2 cup unsalted butter, melted
  • 6 brownie disks (from above)
  • Banana, cinnamon, nut mixture (from above)
  • Honey syrup (from above)
  1. Unroll the phyllo dough and remove the top two sheets.  Cover the remainder of the dough with a damp towel to keep it from drying out (as you move through the recipe, continue to remove sheets as needed but always keep the unused sheets covered.)
  1. Rip off a small square of phyllo dough (two sheets thick) and press it into the bottom of a jumbo silicone cupcake liner.
  2. Brush the top of the phyllo dough with melted butter.  
  3. Top with another two layer square and more butter and then a third two layer square and butter. There should be a total of six layers with butter between every two layers.  (Important: You will drive yourself crazy if you try to make these squares all the exact same size or even if you try to make them all square.  Just stick some phyllo dough that is about the right size in the cup and you'll be fine.  Even if you end up using two or three small pieces instead of one big piece, it will not be a problem.  Relax and have fun!)
  1. Press the brownie disk on top of the phyllo layers. (Note: Don't worry about baking the brownie a second time.  I feared that it would burn, but the sandwiching in butter keeps it nice and moist.)
  2. Top with another two layer sqaure of phyllo dough and more melted butter.
  1. Top the phyllo layer with a thin layer of banana nut mixture.
  2. Top with a two layer square of phyllo and butter. Repeat two more times (you should have three layers of nuts, each separated with two sheets of phyllo dough).  Note: There should be some nut mixture left over.
  3. Top with four layers of phyllo dough with butter between every two layers.
  4. Repeat all steps for the remaining five cupcakes.
  5. Bake at 350 F for 30 minutes or until the cupcakes are golden and crispy.
 .
  1. Sprinkle remaining nut mixture on top of hot cupcakes.
  1. Immediately pour honey syrup over cupcakes, evenly distributing the honey syrup between the six cupcakes.
  1. Cool and eat!  
  2. If not eating immediately, cover loosely until ready to eat.  Do not tightly cover the baklava or it will become soggy.

Read more: http://www.cupcakeproject.com/2011/09/chocolate-banana-baklava-cupcakes.html#ixzz1zAwGSReb

7 Aug 2012

guinness chocolate cake

I remember a few crazy professors from my uni days who used to make bread by mixing bread flour and beer (yep, that’s it, just those two ingredients), coz apparently supermarket bread had too many preservatives and additives.  While that is true, there is a way to make healthy bread. And that is what this recipe reminded me of. Crazy academicians and every crazier uni days.

I loved this cake even before it was baked.  The stout melted butter is deliciously glossy; even more enticing for scatterbrains like me who forget to keep the butter out of the fridge in prep. And because I'm a lifelong chocoholic, I added a little bit of coverture chocolate but that's just me.  You don't have to but if you do, reduce the amount of butter by the quantity of chocolate and dont overkill coz there is cocoa in the recipe already.

This cake is glorious in its moist blackness.  The two major ingredients that make up this cake – chocolate and Guinness – have one thing in common, dark, husky flavour notes.  The sugar transcends the bitterness of the Guinness, yet the tanginess of the stout come bursting through resulting in a rich as old money kinda cake.  If you must, white sugar can be substituted with brown sugar for a less sweeter taste.  But mind you, the bitterness of the stout will be quite obvious.    

Traditionally this cake is not frosted or iced.  But having kids around the house always puts that tub of cream cheese sitting lonely on your fridge shelf to good use.  Besides, having a froth of cream cheese makes this cake all the more enticing, both visually and gastronomically.  In fact, I think this whole cake is bit sinful, so say a little prayer and dive into the damp black magic of this magnificent cake.   

guinness chocolate cake with cream cheese frosting
yield: one 9" cake 
adapted from Nigella's recipe

Ingredients

for the cake
  • 250 ml Guinness
  • 250 g unsalted butter
  • 75 g cocoa
  • 400 g caster sugar
  • 140 ml pot sour cream
  • 2 eggs
  • 1 tablespoon real vanilla extract
  • 275 g plain flour
  • 2 1/2teaspoons bicarbonate of soda
for the frosting
  • 250 g cream cheese
  • 50g butter
  • 250 g icing sugar
  • 1 tsp vanilla essence

Method

for the cake
  1. Preheat the oven to 180°C/ fan forced 165°C
  2. Grease and line a 9"/23cm spring form cake tin.
  3. In a bowl, whisk together the cocoa and sugar.
  4. In another bowl, beat sour cream with eggs and vanilla. 
  5. In yet another bowl, sift together plain flour and bicarb of soda.
  6. In a large wide saucepan, pour the Guinness, add butter in small quantities and heat on medium flame until the butter's melted.
  7. Once melted, whisk in the cocoa and sugar and heat until sugar caramelizes and is mixed thoroughly.
  8. Take off the heat and allow to cool to room temperature.
  9. Once cooled, pour the sour cream, eggs and vanilla mixture into the pan and incorporate well.
  10. Gently fold in the flour and bicarb of soda until all is thoroughly mixed.
  11. Pour the cake batter into the greased and lined tin and bake for 45 minutes to an hour. 
  12. Leave to cool completely in the tin on a cooling rack, as it is quite a damp cake.
  13. If you intend to cover this cake with frosting, cool it in the refrigerator for atleast an hour to allow it to firm up so it's easier to cover.
 for the frosting
  1. In the bowl of a standing mixer, whisk the cream cheese until smooth, add butter and combine well.
  2. Sieve over the icing sugar and mix on medium speed until well incorporated.
icing the cake
When the cake's cold, sit it on a flat platter or cake stand and using a spatula, ice the top of the cake so that it resembles the frothy top of the famous pint.
Enhanced by Zemanta